
By: Sean Struckmeyer | Tech Inspect Home Services
This is part 1 of a series of blog posts further explaining the inspection reports, tips on how to read them, and what the categories and information mean.
A common question we get is, how long are our home inspection reports? A complete home inspection report is routinely 60+ pages, if you were to print it out. (We don’t recommend it 😊 ). Our reports are long, because they contain a lot of educational information and we are inspecting A LOT of systems and components and documenting information about each of them, even if we don’t find anything wrong, we still document it’s current condition, complete with pictures.
But, the way Spectora displays the report, makes it much easier to navigate and move around within the report. It won’t feel like your reading a big long boring 60 plus page report.
Lets start with a few basics:
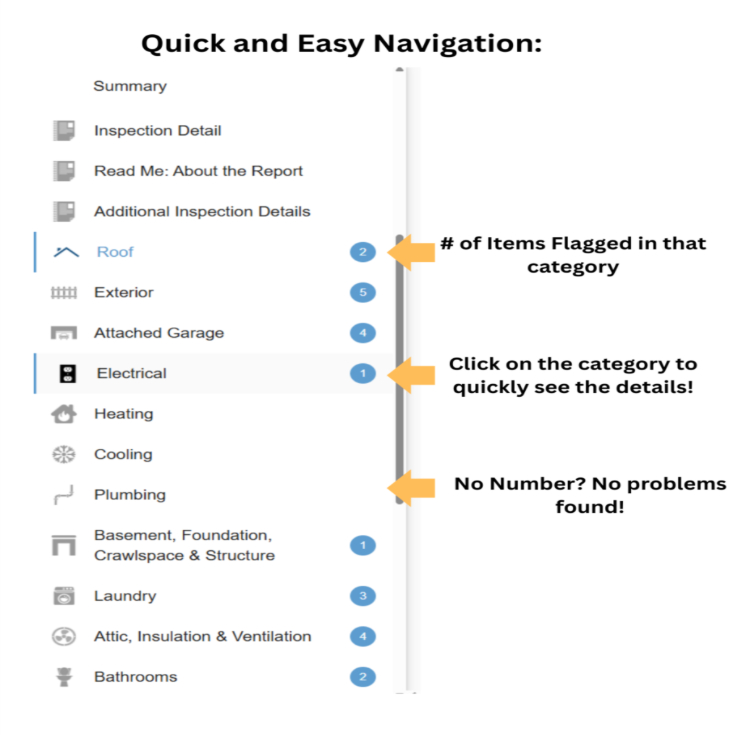
- When using the web-view, Spectora features a left-hand navigation pane.
- Defects are Color Coded, based on type (maintenance items, defects and major concerns)
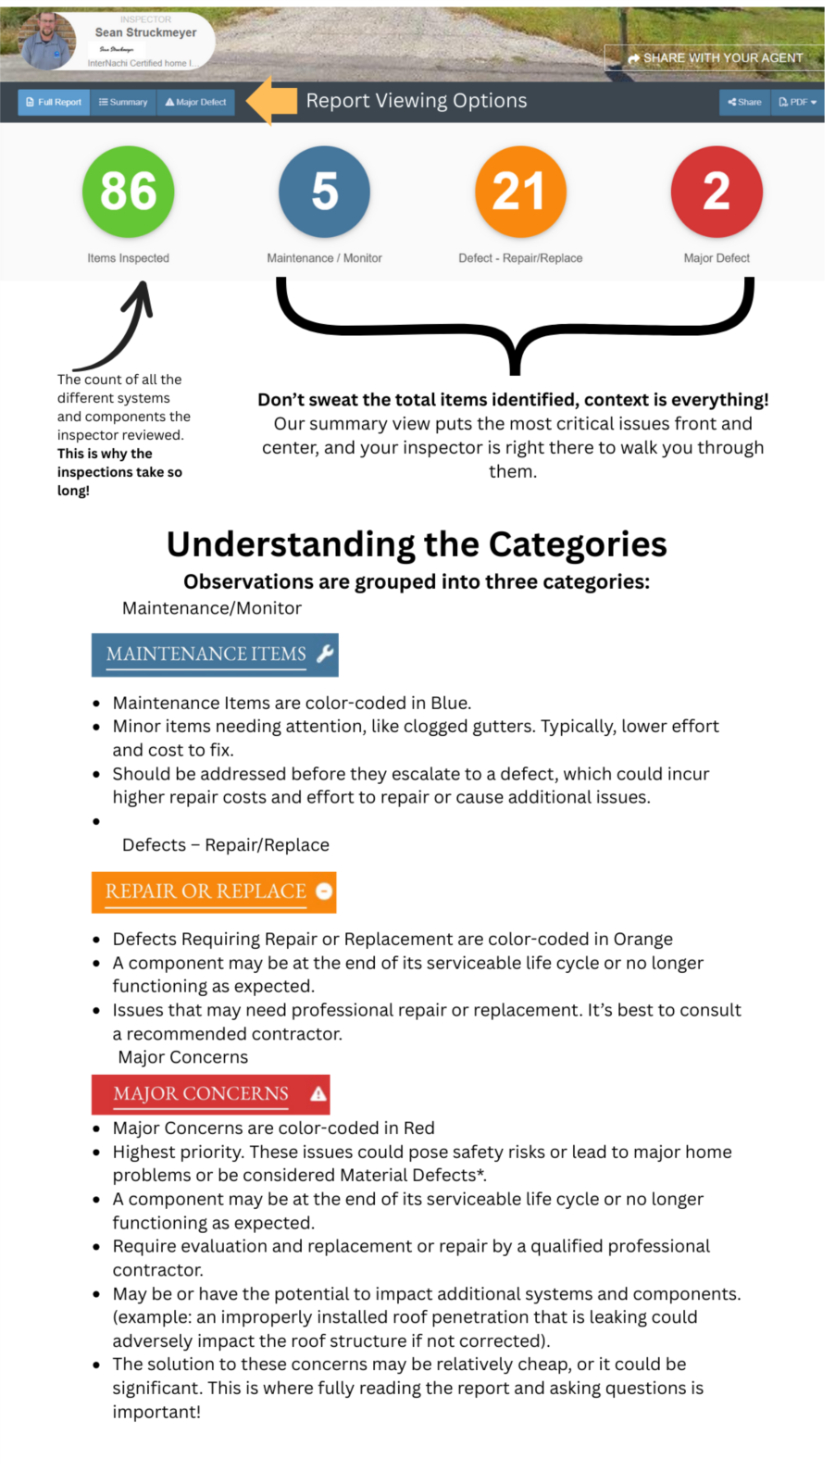
- There are also 3 different views: 1) Full Report 2) Summary and 3) Major Defects
- Full Report – Is just that, it’s the full report. It has all the information sections and defects grouped by category.
- The full report contains a lot of information relevant to the inspection, including the standards of practice, scope limitations and inspection restrictions.
- It also contains a lot of information about the various systems and components. Diagrams, maintenance tips and explanations as to how things work, and how they are supposed to be installed. While this does make the overall report longer, we feel it’s worthwhile providing this information, to support you, the homeowner. This way the inspection report provides more value and can provide future references to support you, the homeowner in maintaining your home.
- Summary – Lists just the Items found needing attention, no ancillary or extra information about the inspection is provided. It lists all the maintenance items, the defects and major concerns. All items are grouped by the major system they are aligned to (e.g. electrical)
- Major Concerns – This shows only the major Concerns documented in the report. (more on the differences below)
- Full Report – Is just that, it’s the full report. It has all the information sections and defects grouped by category.
Note: It’s very easy to toggle back and forth between the 3 views.
If you look at the left-hand side of the screen, there is a navigation pane. The navigation pane groups information by the major system (e.g. Roof, Plumbing, Electrical). From the full report view, if you click on the major system, such as Roof, it’ll jump to that section of the report. This lets you quickly and easily move around within the report. Pretty slick huh?
What’s the Difference Between a Maintenance Item and a Defect and a Major Concern?
The report contains reminders and descriptions about what the categories mean and how to interpret the classification of the various items within the report. It’s important to remember that not all defects are the same and context about each defect is very important. We’ll unpack each category in a future blog post, as they deserve more time and credit to explain than we can detail here.
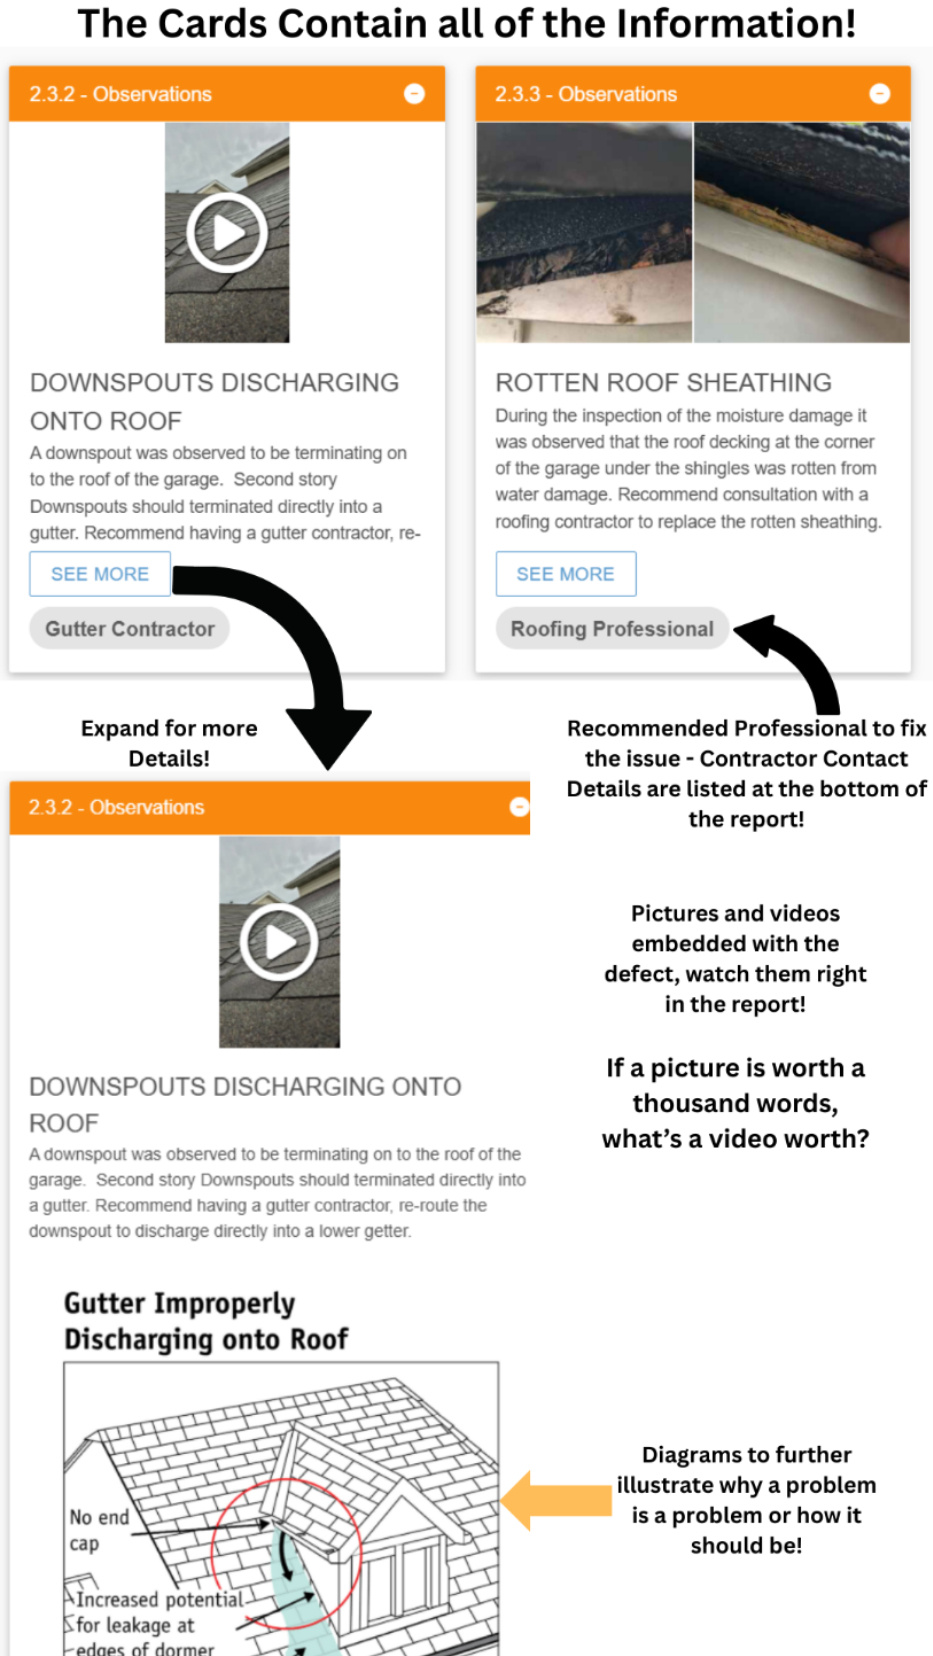
Defect Cards:
A neat feature of this software is that it creates cards that contain information about any issues identified during the inspection. These are called Defects or Observations.
Each card is aligned to the system it was flagged under (plumbing) and contains a description/title, a narrative that describes the defect (more on this below), (it may have include a diagram to provide further illustration) and pictures and/or video and a recommended professional to resolve the defect. Each card is packed with valuable information and can be expanded and collapsed to view more or less information, about the defect.
Narratives:
Our inspection report narratives are written in a specific format to help explain what we’ve found. Keep this format in mind when reading through the report.
Findings – Describes what we observed.
Implications – Simply put, why is this a problem?
Recommendations – What are your options to resolve it. Does it need immediate attention, is it a DIY project or do you need to consult a professional?
Recommended Contractors:
At the bottom of the report, there will be a list of recommended professionals serving the local area that lines up with the type of issues found during the inspection. So, if there’s no plumbing defects, no plumber will be recommended. It’ll have their contact information listed to make it easier to contact them.
Attachments:
On every complete home inspection, there is attached a file that details the typical life expectancy of various, appliciances, components and building materials.
Depending on the inspection type, there may be additional attachments, dependent on the inspection.
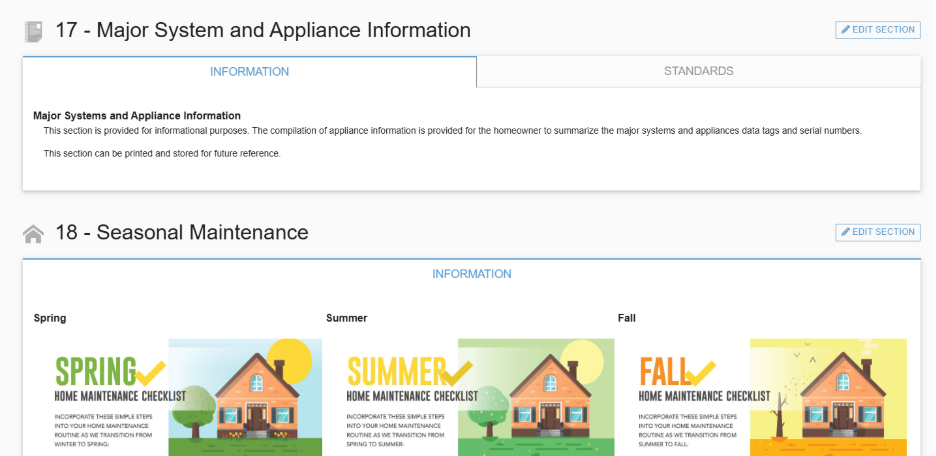
Additional Information:
Included in the report is additional helpful information for the homeowner. The 1st one is a summary of the Major Systems and Applicance Information. This is where the inspector will take pictures of the equipment tags (make, model, serial number) of the major applicances and group them in one section of the report. The idea is that you could print off or extract these few pages of information from the full report to file away/and or have easier access to that information when needed.
The second part, are some seasonal checklists provided by interNACHI. These are to provide guidance for the homeowner to know what key things to take care of throughout the year for easier home maintenance.
Ask your Inspector:
If you don’t understand something, please ask! Your certified home inspector is more than happy to answer any questions that you may have about the report or the inspection.